Among the best qualities of rubber flooring is that it is extremely durable and low maintenance (Clean Rubber Flooring Tiles). Most liquids will not stain or damage the surface, and it is relatively difficult to damage the material with physical impact, due to its resilient yet yielding nature. Rubber flooring is also resistant to burns and is not susceptible to mold or mildew taking hold. Dirt and debris rest gently on the surface of the rubber, making the floor easy to sweep up.
For this reason, rubber tiles are employed in a wide variety of challenging locations, including kitchens, bathrooms, hospitals, playgrounds, and gyms. However, there are some basic cleaning and maintenance steps to follow on a regular basis to both disinfect the floor and keep it looking its best.
If your rubber flooring was installed with adhesive, you should not clean it in any way for at least 72 hours after installation in order to give the adhesive time to get a firm hold. After three full days, you can consider the installation complete and can treat the floor normally.
What You’ll Need

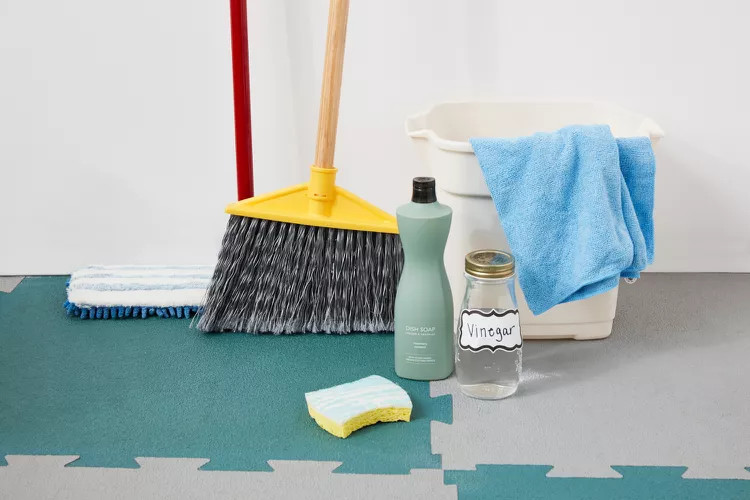
Equipment / Tools
- Broom
- Vacuum
- Mop
- Bucket
- Sponge
- Cleaning cloth or rags
- Cleaning brush
- Professional-grade buffing machine (optional)
Materials
- Non-acidic cleansing agent or mild dish soap
- White vinegar
- White toothpaste (if needed)
- Rubber floor conditioner (optional)
- Fabric softener (optional)

Instructions
Make the Cleaning Solution
For an inexpensive and all-natural rubber floor cleaning solution, mix 1 cup of white vinegar into a gallon of hot water. This solution can be applied with a mop, sponge, or cloth to clean and disinfect the floor. Add a squeeze of lemon or a few drops of the essential oil of your choice to the concoction for a fragrant effect.
Mild dish soap can be substituted for the vinegar in this solution. You can also mix them all together to create an even more potent cleanser. As always, the ratio of water to the cleaning agent will determine how concentrated and effective the cleaner is. In all cases, the water used should be warm to hot, and the mix should be changed frequently to keep it clean.
-
Wet-Wash With a Mop
Mop a rubber floor? Yes, it’s possible. If you get a nasty set-in stain on your rubber floor, you can easily wet-wash it with a mop without worrying about damaging the material. To avoid fighting friction while mopping rubber, select a mop that makes less surface contact, like a string or a microfiber tube mop instead of a flat mop.
-
Spot-Clean Set-In Stains
If you have a stubborn stain that is deeply set-in, use a concentrated cleaning solution along with a hand brush to apply extra pressure to the floor. You can clean vigorously, but make sure you don’t press so hard that the bristles of the brush scar the floor.
-
Tackle Any Urine Stains
Urine can present a particular problem for rubber flooring, causing set-in stains that just can’t be removed using conventional methods. In this case, apply a large amount of white toothpaste to the affected area. Let it dry for 10 to 15 minutes, and then wash it off with warm, clean water. This can be done several times until the stain is removed. If you’d like to go with a commercial cleaner, we recommend Clorox Commercial Solutions Urine Remover.
-
Buff to a Shine
A rubber floor conditioner can be applied to the surface of the floor, either with a cloth by hand, or using a professional-grade buffing machine. If you are using a machine, make sure that it operates at less than 350 revolutions-per-minute, or you risk damaging the floor. Periodic conditioning will help to restore the lustrous shine that your rubber floor had when it was first installed.
An inexpensive alternative to this is to mix 1 cup of fabric softener into a gallon of water and mop it on the floor. Done on a regular basis, this should help to restore some of the original glow.