The BEST biscuit recipe! These homemade biscuits are full of flaky layers and perfect for slathering with butter and honey.
We just can’t get enough of these biscuits! As I’ve been testing this recipe, my family has been enjoying batch after batch of these homemade biscuits. Now that I’ve perfected the recipe, we’ll be making them even more often. These biscuits are just too good!
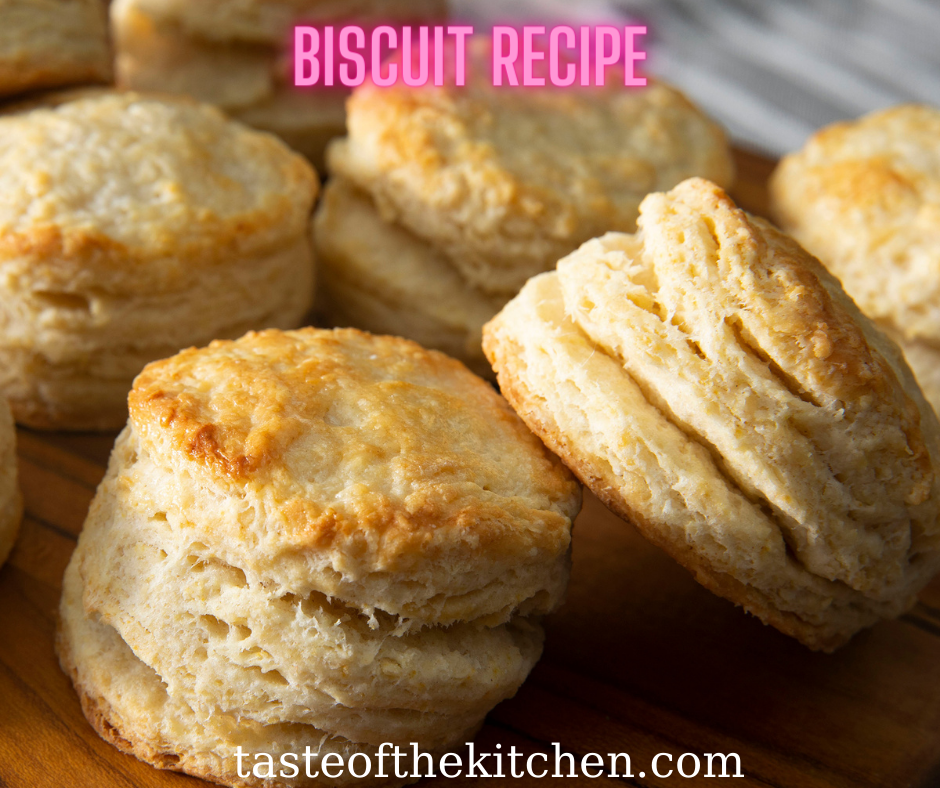
This biscuit recipe makes the very best biscuits. They are fluffy, soft and tender, with lots of flaky layers. The tops brown nicely in the oven, and the bottoms become deliciously crispy. They are delicious as is, and even better when you spread them with butter and a drizzle of honey.
We’ve been enjoying these biscuits as a side dish at dinner. They complement almost any meal! Try them with baked chicken thighs, slow cooker beef stew or butternut squash soup. They are also great for breakfast, alongside some eggs and baked bacon.

MILK OR BUTTERMILK?
You can make these biscuits with milk or buttermilk, or a combination of the two. I’ve tested the recipe all three ways, and the biscuits are delicious no matter which you choose.
When you make this recipe with buttermilk, the flavorful tang of the buttermilk comes through in the buttermilk biscuits. If you use milk, the biscuits turn out especially tender. My favorite is to use half buttermilk and half milk for the best balance of flavor and texture.
Whole milk is best in this recipe, but you can use lowfat if that is what you have on hand. You can also use homemade buttermilk substitute.
HOW TO MAKE BISCUITS
You won’t believe how quick and easy this biscuit recipe is to make! I’ll walk you through the steps, including my tips for success. You’ll find the full recipe with ingredient amounts below.
Freeze the Butter: At least 20 minutes before you plan to make the biscuits, you’ll want to freeze the butter. Freezing makes sure that the butter is really cold, which is important for creating flaky layers in your biscuits. Frozen butter is also easier to shred using a box grater – more on that below.
Combine Dry Ingredients: In a large bowl, whisk together all-purpose flour, baking powder, sugar and salt. Be sure to use baking powder (not baking soda), and use the full tablespoon (not teaspoon) called for in the recipe. You can adjust the amount of sugar to your taste preferences. We prefer less sweet biscuits, so I usually use just 1 or 2 teaspoons.
Grate the Butter & Stir it in: This is my favorite biscuit making trick! Once the butter has gotten really cold in the freezer, you’ll grate it on a box grater. This is really quick and easy to do. Then you can quickly mix the grated butter into the dry ingredients, using your hands or a fork. If you’re like me and don’t enjoy the process of cutting butter into dry ingredients, you are going to love this trick! The grated butter also gives you perfectly sized pieces of butter throughout your biscuits.
Mix in Milk or Buttermilk: Pour 1 cup of milk or buttermilk (or a combination of the two) into the bowl with the other ingredients. Use a fork to mix until a dough forms. It’s ok if a little bit of the dry ingredients aren’t incorporated at this point. If the dough seems very dry and you are having a hard time getting it to come together, you can add 1 to 2 tablespoons more milk or buttermilk.
Fold the Dough: Turn the dough (and any flour bits) out onto a lightly floured work surface. Pat the dough down into a rectangle that is about 1 1/2 inches thick. Fold the dough in half on top of itself and press it down into a 1 1/2-inch thick rectangle again. Repeat this step, folding and pressing the dough 4 to 6 times total. This is called laminating the dough and it creates those flaky layers that we all love in biscuits.
Cut the Biscuits: After you fold the dough the last time, press it out until it is about 1-inch thick. Press a round biscuit cutter straight down into the dough to cut the biscuits. Do not twist the biscuit cutter as you cut. Place the biscuits on a parchment paper-lined baking sheet.
Brush the Tops and Bake: Before baking the biscuits, brush the tops with milk, buttermilk or cream. This helps the tops of the biscuits to brown as they bake. Bake the biscuits until they are lightly golden on top, 13 to 16 minutes.

BISCUIT RECIPE TIPS
- When baking biscuits, it is important to keep the butter and milk or buttermilk as cold as possible. Keep the butter in the freezer and the milk in the refrigerator until you are ready to use them. Avoid letting the dough sit at room temperature before baking the biscuits.
- Freeze and grate the butter using a box grater. The small pieces of shredded butter will create little steam pockets in the biscuits as they bake, giving you great rise and flaky layers.
- Don’t skip the step of folding the biscuit dough in half and pressing it out 4 to 6 times before cutting your biscuits. The folds help to create flaky layers, much like when making croissants.

- Press straight down with your biscuit cutter and do not twist or turn it. Twisting the cutter seals off the edges of the biscuits and keeps them from rising as much.
- For golden brown biscuit tops, brush them with milk, cream or buttermilk before baking.
This site contains affiliate links. If you make a purchase through these links, I may receive a small commission, at no extra cost to you. Thank you