Ensure proper tile alignment and spacing by learning how to use tile spacers.
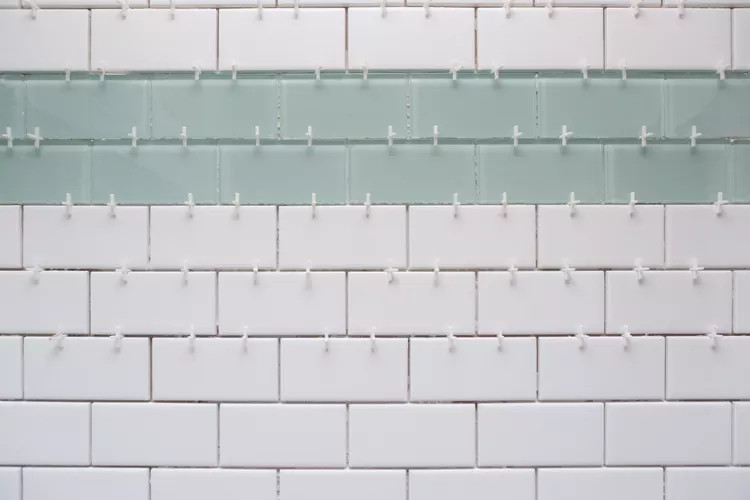
Replacing old, cracked, and chipped tile can revitalize the appearance of a room, but this isn’t a task that can be accomplished in just a few minutes, especially when you need to line up every tile in near-perfect spacing to get the desired finish. However, tile spacers are designed for facilitating this exact process. These small, plastic objects should be placed between tiles as they are being installed in order to ensure that the gaps between the tiles are of a consistent width.
Tile spacers are an inexpensive and reusable method for quickly and effectively spacing out new tiles during a tile installation project, like installing a new shower, replacing the tiles on the floor, or putting in a new backsplash. These T-shaped or cross-shaped objects make it easy to create uniform spaces between tiles, and they even come in several different sizes so that the gap between tiles can be increased or decreased according to your preference.
What Are Tile Spacers?
Tile spacers are small, plastic objects that can be T-shaped or cross-shaped. They are made to sit between tiles during installation in order to create a consistent width between each of the tiles as they are installed. This helps to prevent tile misalignment during installation, improving the overall appearance of the project. Some tile spacers even have a self-leveling system, incorporated to further help give your tile installation a professional appearance.
How to Use Tile Spacers
Choose Tile Spacers According to Size
It’s important to take the time to determine the size of the gap that you want between the tiles before starting the project. Tile spacers range in size from 1/8-inch to 3/8-inch. Typically, grout lines on a tiled wall, backsplash, or shower stall should be thinner, from 1/8-inch to 1/4-inch, while grout lines for floor tiles and other horizontal surfaces should be a bit wider, from about 1/4-inch to 3/8-inch.
In general, thin grout lines are easier to keep clean after installation because there isn’t as much surface area to trap dust, dirt, and debris. However, if the dimensions of the room, wall, or floor are slightly off, then thicker grout lines can help to hide some of the inconsistencies and give the project a more balanced appearance.
Head to your local home improvement store and select the tile spacers that you need according to the width of the gap that you want between tiles. To figure out the number of spacers you need for the project, simply multiply the number of tiles by 4, then add about 10 percent extra to account for any discrepancies.
Place the First Tile and Tile Spacers
With the correct size and number of tile spacers ready to go, you can begin the tiling project by lining up the first tile. This is the tile that must be the most accurately placed, because all other tiles will be aligned according to the positioning of the first tile. It’s recommended to use a chalk line or laser level to ensure that the first tile is installed correctly before proceeding. Alternatively, you can align the first tile with the corner of the room or wall if you are confident that the room or wall is not misaligned.
Once the first tile is in place, you can start to position the surrounding tiles. Apply enough adhesive to the floor or wall for the next tile, then place the tile in an estimated position. Insert the tile spacers between the first tile and the second tile to correct the gap width and alignment of the tile. Keep in mind that, to get an even gap, you need to use at least two tile spacers along the edge of the tile.
Add Additional Tiles
Continue the process of applying adhesive to the floor or wall, then laying a tile on top of the adhesive, while adjusting the gap and alignment using tile spacers. Two or more tile spacers should sit vertically in the gap between each tile in order to create a uniform appearance. As you lay each successive tile, ensure that it makes contact with the spacers on the tile next to it without squeezing or deforming the spacers.
The tile spacers need to stay in place until the adhesive has had time to properly set so that the tiles do not become misaligned before the grout can be added. This typically takes about 20 to 30 minutes.
-
Remove the Tile Spacers
Tile spacers help to align the tiles during installation and also help to keep the tiles from moving while the adhesive sets, so they need to remain in the correct position for about 20 to 30 minutes. If the tile spacers are removed before the adhesive sets, the tiles may shift and become misaligned. However, if the tile spacers are left in for too long, then they can become attached to the adhesive, making them difficult to remove.
Remove tile spacers by sliding a chisel, scraper, or flat-head screwdriver under the horizontal arm of the spacer and applying pressure to pop the tile spacer out of the gap. Most spacers will come out easily and can even be reused for future projects. If a spacer does get stuck, do not grout over and around the spacer: The grout won’t set properly, or if it does set it will crumble in a short period of time.
Instead, use a chisel, scraper, or flat-head screwdriver to try and separate the spacer from the adhesive. Needle-nose pliers can also help to grip the spacer and pull it out of the gap.
-
Rinse and Store Tile Spacers
Most tile spacers will come out without any problem. These spacers can be rinsed off, dried, put into a zip-lock bag, and stored safely in a toolbox. Any tile spacers that broke, cracked, or become warped during the installation should be discarded and replaced for future projects.
Keeping Tile Spacers in Good Condition
While many people think of tile spacers as disposable because of their inexpensive price and niche purpose, they are actually reusable if the spacers are removed in a timely fashion and properly cleaned and stored. After a tiling project has concluded, rinse the tile spacers to remove any remaining adhesive, then dry them off. The spacers can be kept safe in a bag, toolbox, compartment, or drawer in the workshop.
For the sake of simplicity and keeping the workshop organized, consider storing the tile spacers with any other tiling accessories, or put them into their own designated compartment or drawer in the workbench.