Carving jack-o’-lanterns is a Halloween tradition that dates back to early 19th century Ireland. Back then, it was turnips with demonic faces to scare away lost souls. These days, in the United States, picking out a pumpkin and carving it is an integral, fun part of the All Hallows’ Eve celebrations for kids and adults alike, and a great way to decorate your home for the holiday.
Whether you want to go for an artistic effort or a traditional face with crude triangular eyes and a toothy grin, follow these steps to learn how to carve a pumpkin safely and successfully.
What You’ll Need
Equipment / Tools
- 1 Large spoon or ice cream scoop
- 1 Tracing marker
- 1 Serrated kitchen knife or pumpkin carving saw
Materials
- 1 Pile of old newspapers
- 1 Candle or battery-operated light
Instructions
1. Pick the Right Pumpkin
When picking the best pumpkin for carving, the bigger it is, the better. Too small, and it’s tricky to carve. Plus, it won’t make much of an impact on a large front porch.
Choose a fresh, smooth-surfaced pumpkin free from bruises and signs of mold on the stem. Look for a firm stem, a flat bottom to make carving easier, and a light skin color, as this indicates a softer pumpkin that will be easier to carve.
2. Decide on a Design

Don’t go too ambitious if you’re a beginner pumpkin carver. Simple, bold patterns are easier to carve and look good on display.
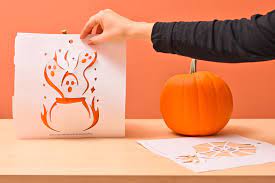
You can draw your own design on a piece of paper or find a printable jack-o’-lantern template online. You might need to resize it, so it covers the right amount of your pumpkin.
3. Set Up a Workstation
Pumpkin carving is a messy business, so you’ll want to take precautions to prevent sloppy pulp from getting everywhere.
Where possible, work outside using an outdoor table or another stable surface. Cover whatever surface you’re using with newspapers.
If you aren’t working on your lawn, watch out for pulp falling on the ground. You don’t want to take a nasty tumble slipping on it.
Gather your supplies and supervise children and pets around sharp cutting tools.
4. Cut Out the Lid

To prevent the lid from falling inside the pumpkin as it ages and shrivels, hold the kitchen knife at a 45-degree angle rather than straight up and down when cutting. Doing this creates a lip for the lid to rest on.
5. Scrape Out the Inside
Now that you have an ample opening at the top of the pumpkin, it’s time to scrape out all the pulp and seeds.
Using a large metal spoon or ice cream scoop, scrape it right down so that the pumpkin’s walls are around 1 inch thick. If you go too thin, the walls could collapse, and too thick makes it challenging to carve out the design.
Aim to have as smooth an inner surface as possible on the back wall as this helps reflect the light you put inside the jack-o’-lantern.
If you’re feeling adventurous, you could save the pumpkin seeds to try growing your own gourds next season.
6. Draw on the Pattern

Securely tape your design template onto the pumpkin, and trace the lines for carving with a marker. The marker should transfer through the paper. If it doesn’t, poke holes in the paper with an awl or sharp pencil along the lines to help it make an outline. If you’re confident, you could draw your own design directly onto the squash walls.
Don’t throw the template away. It’s handy to keep nearby for reference.
7. Carve Out the Design
Thoroughly wash your hands so there’s no slippy pulp residue on them before starting to carve.
If you have a simple design, using a long, serrated, sharp kitchen knife should do the job. Alternatively, you can invest in a pumpkin carving kit that has a special serrated saw that’s perfectly meant for this job. It’s less likely to get stuck in the pumpkin wall as your cutting, causing injury. This is a good option if you’re letting older kids have a turn at carving.
Cut slowly, carefully, and always away from you using a gentle back-and-forth motion. Making basic, rough cuts first allows you to get rid of the big pieces of the pumpkin wall. You can then tidy up the edges with a smaller blade if the design is intricate.
Unlike with the lid, always make straight cuts rather than at an angle for a clean finish.
8. Preserve Your Pumpkin (Optional)

Try smearing some petroleum jelly along the carved edges to help preserve your jack-o’-lantern and prevent it from shriveling prematurely. This seals in moisture and reduces discoloration.
9. Illuminate Your Pumpkin
Now you’re ready to light up your jack-o’-lantern and put it on display.
Leave the lid off if you’re using a candle or carve a hole in the backside that serves as a chimney. Never leave pumpkins with lit candles inside them unsupervised, and make sure there’s no leaf debris or other flammable materials nearby.
A safer option, especially if you’re welcoming trick-or-treaters with floaty costumes, is to use a battery-operated flameless candle instead.
