One of the easiest ways to spark up bedroom decor without painting the walls or replacing your furniture is to dress up your closet doors. Why have plain white doors when there are so many DIY ways to add color, pattern, or function without spending a bundle?
Whether you want to have some fun in your kid’s room or add a bit of whimsy to your own bedroom, you’re sure to find inspiration in one of the nine ideas shown here. Make sure to remove the doors from the hinges and lay them flat before starting any of the painting projects—you’ll find it much easier to work that way.
1. Add Pops of Pattern With Wallpaper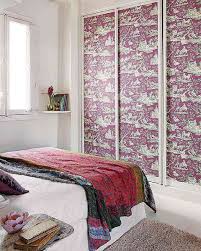
If you’ve found a wallpaper that you love but you don’t want to cover your full bedroom walls with a pattern, hang the paper on your closet doors instead. Today’s wallpaper is a far cry from the difficult-to-hang, impossible-to-remove paper you might remember from your childhood. Most wallpaper these days is self-adhesive and easy to strip if you move or just grow tired of the design. And with so many great wallpapers on the market, you’re sure to find one that adds just the touch your bedroom needs.
This can be a great way to update those out-of-style mirrored sliding closet doors.
2. Design With a Savvy Stencil
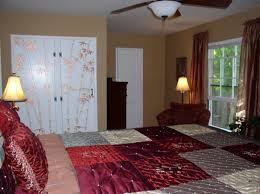
Give your closet artistic flair with a stenciled design. You can go as simple or as elaborate as you’d like—there are stencils available in every motif imaginable. Dress up a child’s room with whimsical woodland creatures or sports images, or add a touch of elegance to a primary bedroom with bamboo images in metallic paint, as shown here.
Craft stores, paint stores, and online retailers all sell an impressive array of stencils. Before starting, use graph paper to draw your doors and plan out your stenciled design, experimenting until you have the most pleasing layout.
3. Customize With a Painted Mural
The fantastic mural on the closet doors shown here is the work of artist Fred Gonsowski in his own home. If you have similar artistic ability, you’ll probably feel comfortable working freehand on a design of your own creation. If not, look for inspiration in pictures and photographs, and when you find the perfect image for your bedroom, enlarge it and print it out to use for a rough outline on your closet door prior to painting. If that is a bit more effort than you’d like, why not paint a simple scene, or just have fun with geometric shapes, dots, stars, squiggles, or stripes?
4. Add Functionality With Dry-Erase Paint
Do you have a teenager with calculation-intensive homework like algebra, geometry, physics, or chemistry? How about a child who likes to draw, write poetry, or just doodle? If so, give them a working surface similar to one found in a classroom by covering all or a portion of the closet doors with dry-erase paint. Look for specialized dry-erase paint to turn your doors into a functional whiteboard.
Make sure your kids use only dry-erase pens for drawing or writing—never use permanent markers—then simply wipe the marks away with a paper towel or rag to erase mistakes or clean the board.
5. Paint With Practical Chalkboard Paint
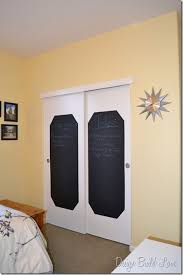
Turn the closet doors of a younger kid’s bedroom into a chalkboard. It’s easy with chalkboard paint, which isn’t limited to black any more—you’ll find a wide range of bright colors. Simply paint it on, let it dry for a few days, rub the entire surface with chalk, and then erase. Now the surface is ready for your budding Picasso’s scribbles and alphabet practice sessions.
Cover the entire surface of the doors, or just use the chalkboard paint in the door’s centers as shown here—get all the details at Design Build Love.
6. Use Frames to Create Paneled Doors
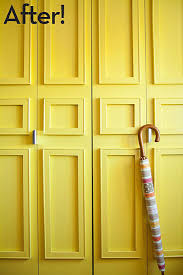
Give your closet doors some dimensional interest with little more than paint and canvas stretchers or frames. This project works best on single-door closets or folding doors, but avoid using this idea on sliding doors.
- First, paint the door with a base color of your choosing. (Using glossy paint makes it easier to clean the doors.)
- Next, paint your canvas stretchers or frames using the same color as the base (as shown here), or go bolder with a contrasting color, a rainbow of frames, or alternating hues.
- Then, attach the frames to the door using adhesive strips for easy removal. Before attaching the frames, plan out the pattern on the door with light pencil marks and use a level to be sure each frame is perfectly positioned to your liking. Get all the details at Curbly.
7. Soften the Room With a Curtain Door
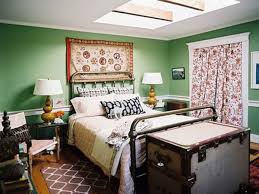
Who said that closet doors have to be solid wood? If you have limited room or you prefer something soft, textural, and as easy to change as your mood, hang a curtain in place of a door. The trick to keeping this look neat is to hang the curtain rod inside the closet up above the door—so that from the outside, the top of the curtain is hidden.
Be sure you measure before getting started—you need a rod that is at least a couple of inches wider than your closet door and curtains long enough to reach the ground once mounted. Just slide the curtains to the side, or part in the middle if you are using two panels.
8. Personalize Your Doors With Decoupage
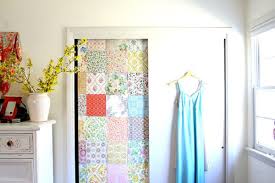
Decoupage is a great way to make use of fabric scraps, scrapbooking paper, gift wrap, old maps, botanical prints, or any other lightweight, flat material that can be glued to your door. There are several options: Cover the entire door; create an interesting centerpiece and surround it with painted molding; decoupage just one door of a pair of sliders (as in the room here); or frame the doors with a decoupage design to let the original surface show through.
Before starting, remove the door from the hinges and lay it flat. Arrange your paper or fabric scraps until you like the design, and then use a decoupage adhesive like Mod Podge to adhere the design to the door. Give the finished design several top coats of Mod Podge to create a wipeable, shiny, and smooth surface.
9. Design Quick and Easy With Wall Decals
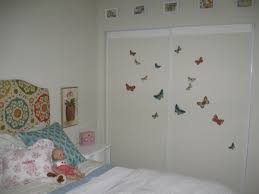
Decorating your closet doors with wall decals is probably the easiest way of all to give them a bit of color and decor power. This technique works well in a child’s room, where you’ll probably want to change the theme as your child gets older. Wall decals are self-adhesive and peel away easily without leaving any marks or residue. They also come in a nearly limitless range of designs, sizes, and colors, so you can go as simple (like the butterfly decals seen here), or as sophisticated and elaborate as you’d like for your own room.
